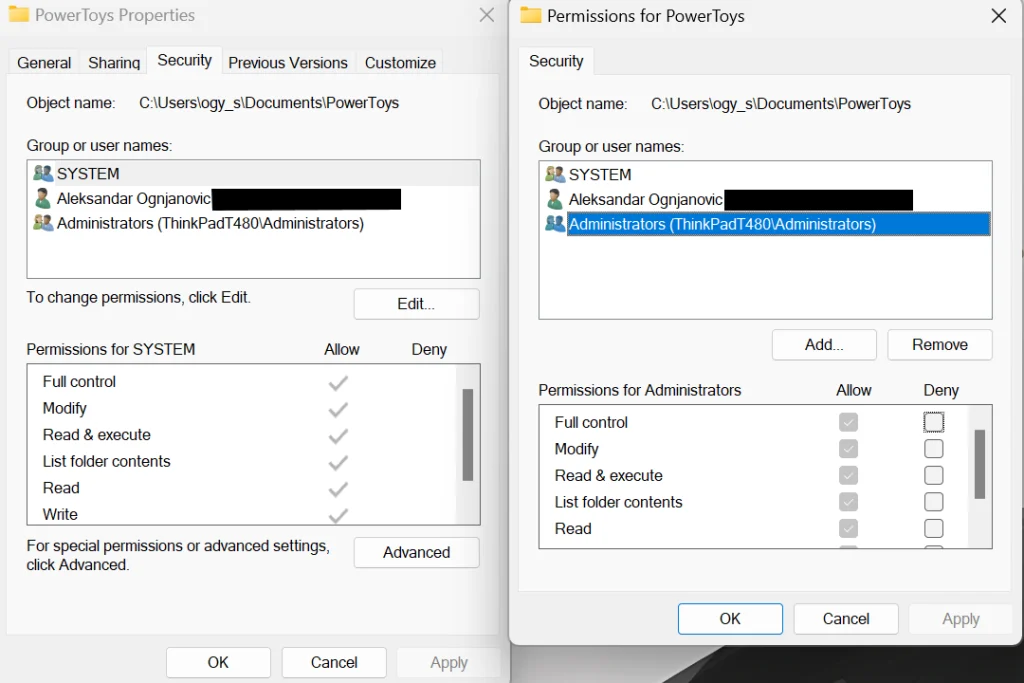
The “You require permission from TrustedInstaller” error can be a significant impediment when managing files on your Windows system. This message appears when you try to modify or delete system-protected files, indicating that TrustedInstaller, a Windows service that protects critical system files, has restricted access.
Understanding how to safely obtain the required permissions is critical for advanced users who want to customize their system or troubleshoot specific issues. This guide outlines the best ways to get around this error, allowing you to take ownership and change permissions on protected files and folders.
In this article:
ToggleHow to fix the “You require permission from TrustedInstaller” error in Windows
When you see the “You require permission from TrustedInstaller” error in Windows, it means you’re attempting to modify, delete, or rename a file or folder protected by Windows Resource Protection (WRP). TrustedInstaller is a built-in Windows user account with exclusive access to these protected system files, ensuring the operating system’s integrity.
Here are some effective solutions to this problem:
1. Take Ownership of the File or Folder
To modify a protected file or folder, you must first take ownership of it, transferring permissions from TrustedInstaller to your user account.
Here’s how to take ownership of the file:
- Right-click on the file or folder you wish to modify and select “Properties.”
- Go to the “Security” tab and click on “Advanced.”
- At the top of the window, next to “Owner,” click “Change.”
- Enter your username in the box and click “Check Names” to verify. Then, click “OK.”
- Check “Replace owner on subcontainers and objects” if you’re taking ownership of a folder.
- Apply the changes and close the Properties window.
2. Grant Full Control to Your Account
After taking ownership, you need to grant your account full control permissions to make the desired changes. Here’s how to do that:
- Right-click on the file or folder again and go to “Properties.”
- Navigate to the “Security” tab and click on “Edit” to change permissions.

- Select your user account from the list.
- Check “Allow” next to “Full control” and click “OK” to apply the permissions.
3. Use Command Line to Take Ownership
For advanced users, ownership can also be taken via the Command Prompt with administrative privileges:
- Open Command Prompt as Administrator by searching for it in the Start menu, right-clicking, and selecting “Run as administrator.”
- To take ownership, type the command
takeown /f "full path of folder or file" /r /d yand press Enter. - To grant full control permissions, type
icacls "full path of folder or file" /grant administrators:F /tand press Enter.
4. Use Windows PowerShell to fix You require permission from TrustedInstaller
PowerShell offers another method to take ownership and change permissions, often preferred for its robust capabilities. Here’s how to take ownership using Windows PowerShell
- Open Windows PowerShell as Administrator from the Start menu.
- Use the command
Get-Acl "full path of folder or file"to check current permissions. - To take ownership and modify permissions, use the appropriate
Set-Aclcommands. This might require creating a new Access Control List (ACL) object in PowerShell, which can be more complex and is generally recommended for experienced users.
5. Utilize Third-party Software
Several third-party applications can simplify the process of taking ownership and changing permissions. Tools like “TakeOwnershipPro” and “Unlocker” provide user-friendly interfaces to modify protected files without using command-line utilities.
When dealing with system files, proceed with caution. Modifying or deleting protected system files may cause system instability or operational issues. Always ensure that you understand the file’s function and the implications of any changes. Additionally, creating a system restore point before making any changes is recommended to provide a recovery option in the event of unintended consequences.
To avoid the “You require permission from TrustedInstaller” issue and obtain access to protected files, take careful steps to maintain system integrity. By acquiring ownership and assigning the necessary permissions to your account, you can efficiently manage system files that Windows would otherwise lock.
Whether you want to use a graphical user interface or command-line tools, the methods shown here give a way to change protected files. However, it is critical to proceed with caution and understand the purpose of each file before making modifications to avoid unintentional system difficulties.
For people unfamiliar with Windows’ file protection features, seeking professional advice or conducting significant research is recommended before starting.


