How to add faces to Google Photos in 3 quick steps
Organizing and backing up photos is an important task for all smartphone users. Google Photos are certainly the most obvious choice for the…

Organizing and backing up photos is an important task for all smartphone users. Google Photos are certainly the most obvious choice for the majority of Android photo enthusiasts. With lots of amazing features and multiplatform reach going for it. And, if you’re not concerned with privacy, you can even add faces to Google Photos.
The list of great features is long and includes hi-quality backups, automatic albums, AI assistance for improving and tweaking photos and videos, and of course, automatic and manual geo and people tagging in photos. We’ll try to expand on face recognition and explain how to tag people in Google Photos without making it a chore.
Step 1: Make sure you’ve enabled Face Grouping
Let’s start with the frequently-mentioned major drawback. In comparison to the discontinued Picasa, you can’t tag people in photos on your own accord. The machine learning algorithm recognizes and groups people before you can assign their names. Once it collects all photos of an individual face, you can apply tags.
Due to privacy laws, this feature is not available in most European countries. You can enable it with a VPN, by choosing a USA server. This is only a one-time procedure, and you can ditch the VPN later on. Or you can learn more about long-term advantages of VPN and maybe get a premium VPN service. Once you’ve done it, make sure to enable Face Grouping and associated options in Google Photos settings.
Here’s what you need to do, step by step:
- Download and run any VPN service on your PC (like Tunnel Bear or similar clients). You can also use proxy browser extensions.
- Run the VPN and connect to a USA-based IP address. It doesn’t matter where in the USA.
- Open your PC browser and navigate to Google Photos for Web.
- Sign in with the Google account you use for Google Photos on your phone.
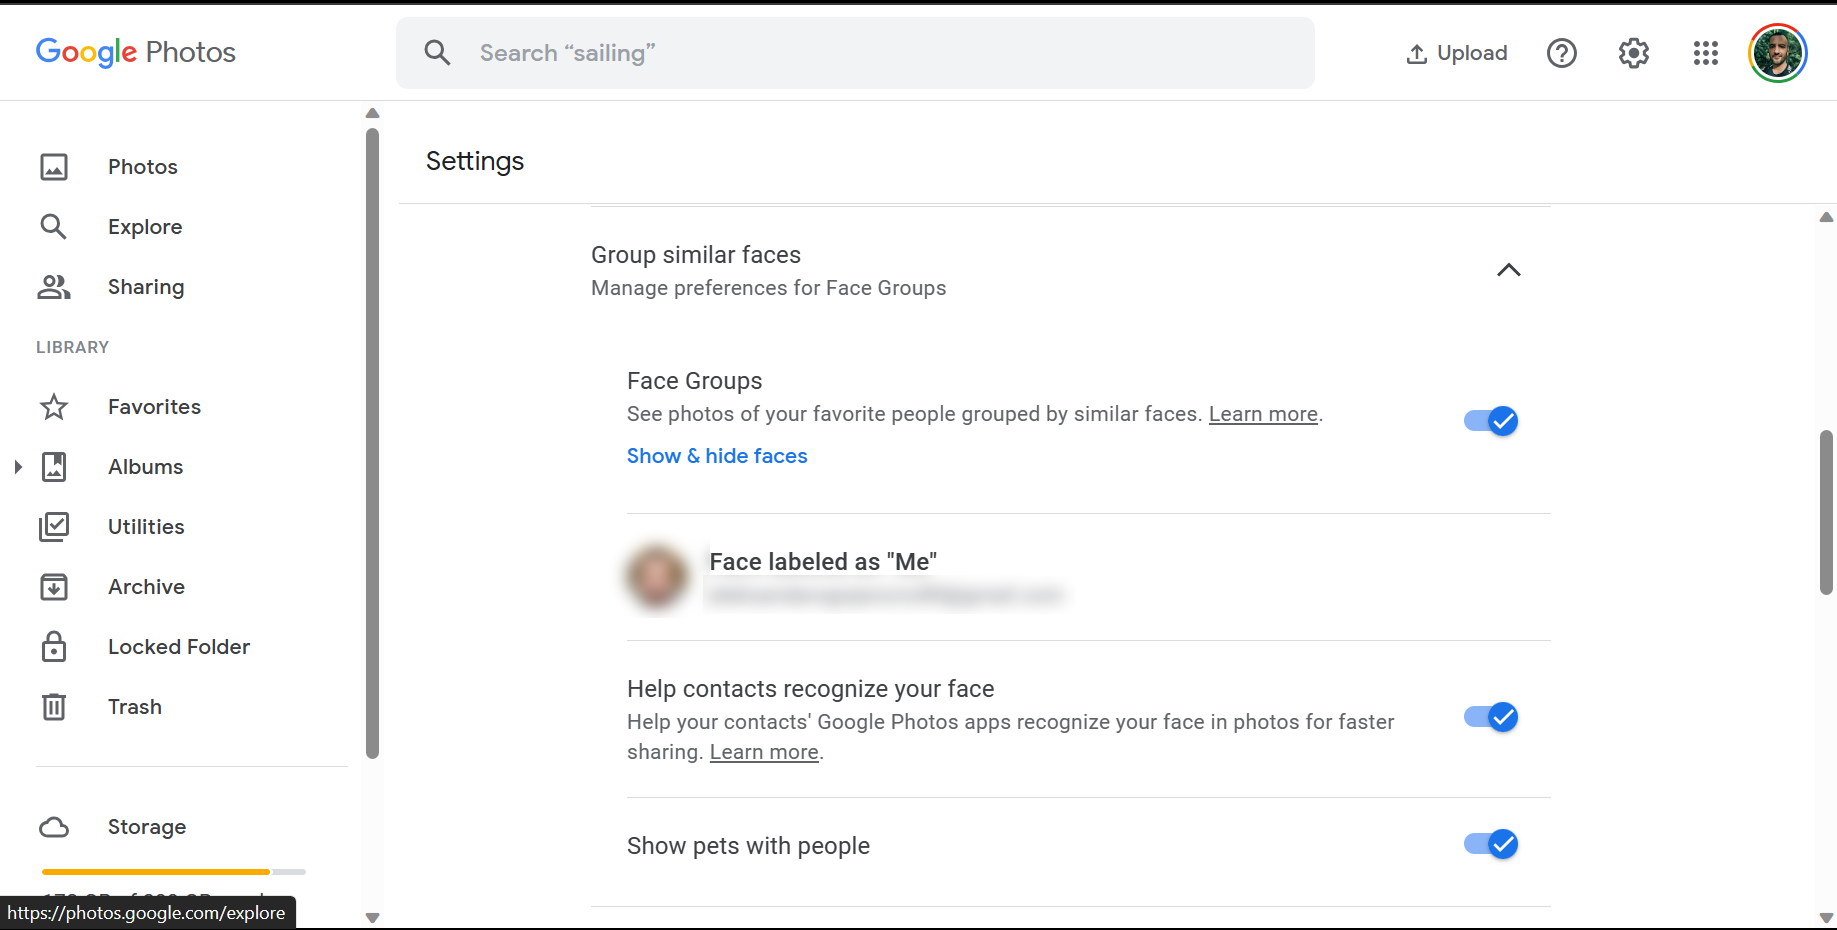
- Click on the cog icon in the top right corner and open Settings.
- Expand the Group similar faces section and enable Face groups. You can also add pets to the People group as the engine can identify and distinguish pets, too.

- Disable VPN and close it. It served its purpose.
- Now, just wait for a prompt.
Step 2: Assign names to recognized faces
Once we dealt with that segment, the next thing you should do is wait. The machine learning algorithm needs some time to recognize and gather all faces. And the more photos you have, the longer you’ll need to wait. I had to wait 3-5 days for 1800 photos, but this isn’t a rule.
When the faces are finally grouped, you’ll be asked to tag them. Firstly, you’ll need to assign your account to your face. After that prompt, you can assign names to all recognized faces.
Here’s how to do it:
- Open Google Photos either on your phone or PC.
- Open Settings.
- Expand Group similar faces.

- Choose yourself from the list of recognized faces.
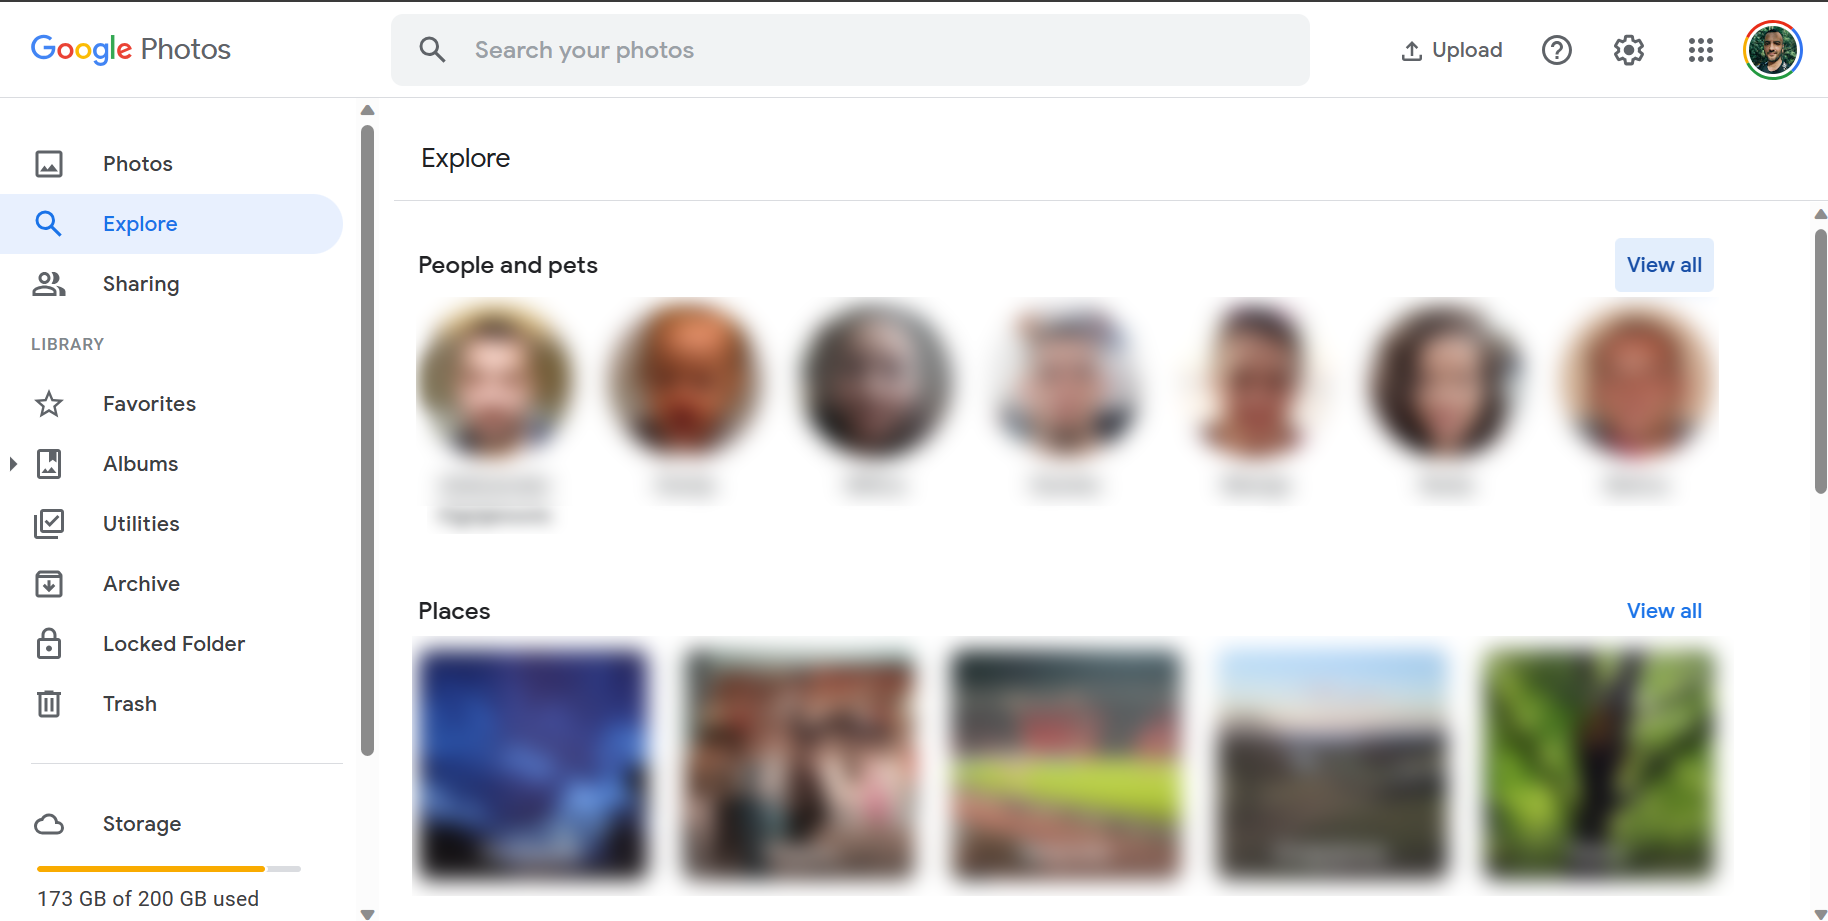
- Now, close Settings and open Explore.
- Open the People (or People & Pets) album and you should see all recognized faces.
- Click on the individual person and assign a name to it. It can be a nickname or anything else which fits your liking.
After that, you can search for a person and all the photos of that person will appear. Which is, in our humble opinion, very nice.
Step 3: Google Photos can’t recognize faces
Finally, if you’re waiting and waiting and nothing happens, we see only 3 available options. The first one is to keep on waiting, the second requires you to disable and enable Face grouping again, and the third one, sadly, suggests removing and reuploading all photos in the Google Photos app.
We’re aware that the third option isn’t the one preferable if you want to add faces to Google Photos, but it seemingly worked for some affected users. You’ll need to use your PC to download all photos and re-upload them again with Face grouping enabled. Of course, depending on your bandwidth speed and the number and quality of photos, this can take a lot of time.
Even though we won’t recommend this, here’s how to do it if you decide it’s worth a try:
- Open the internet browser on your PC.
- Navigate to the “Google Takeout” page.
- Click Select None.
- Toggle only Google Photos and click Next at the bottom.

- Download the whole archive and save it on your PC.
- Now, open Google Drive and delete the Google Photos folder.
- Open Google Photos in a browser or download the Google Drive client for Windows.
- Upload all photos again.
- Wait until the machine learning algorithm groups faces.
With that said, we can conclude this article. Don’t forget to share your thoughts about Google Photos or add an alternative way to solve the recognition issue. You can do so in the comments section below.
Editor’s note: This article was initially published in July 2018. We made sure to revamp it for freshness and accuracy.